Skip to content

Chimney tuckpointing is often the difference between a small mortar repair and a full chimney rebuild — and most Atlanta homeowners don’t realize their chimney needs it until the damage has already spread. From the street, a chimney can look perfectly fine while the mortar holding its bricks together is quietly breaking down.
That’s a common problem with aging masonry chimneys in Atlanta. Between heavy rainfall, humid summers, occasional winter freezes, and years of weather exposure, mortar joints slowly deteriorate until water starts working its way deeper into the structure. At first, you might notice a little white powder on the bricks or a few small cracks between the joints — nothing that seems urgent. But minor mortar damage can eventually become loose bricks, interior water damage, a deteriorating chimney crown, or a chimney that needs a partial rebuild.
Not every damaged chimney needs to be rebuilt. Sometimes, professional chimney tuckpointing is all it takes to restore the mortar joints and protect the masonry. The challenge is knowing when it’s enough — and when the damage goes deeper.
For homeowners across Atlanta, Sandy Springs, Roswell, Marietta, Alpharetta, Dunwoody, Brookhaven, Decatur, and Smyrna, this guide covers the seven warning signs to look for, what makes chimney mortar deteriorate, how chimney tuckpointing works, what it costs, and when rebuilding becomes the safer option.
Table of Contents
- What Is Chimney Tuckpointing?
- 7 Signs You Need Chimney Tuckpointing
- Why Chimney Mortar Deteriorates in Atlanta
- A Representative Alpharetta Scenario
- Chimney Tuckpointing vs. Partial Rebuild vs. Full Rebuild
- What a Proper Chimney Tuckpointing Job Includes
- Should You Waterproof After Chimney Tuckpointing?
- How Much Does Chimney Tuckpointing Cost in Atlanta?
- When Is Chimney Mortar Damage a Safety Issue?
- What Chimney Tuckpointing Won’t Fix
- Before You Hire a Chimney Tuckpointing Contractor
- How to Choose the Right Chimney Company
- Final Answer
- Final Advice From Our Team
- FAQ
What Is Chimney Tuckpointing?
Chimney tuckpointing is the process of removing damaged or deteriorated mortar from between the bricks and replacing it with new, compatible mortar. More precisely, masons often call this repointing — traditional tuckpointing is a decorative finishing technique, but homeowners and contractors commonly use the two terms interchangeably when they talk about chimney mortar repair. Either way, the goal is the same: restore the joints so they can do their job again.
Mortar does more than make a brick chimney look finished. It helps hold the masonry together, accommodates small movements, and forms part of the chimney’s defense against rainwater getting in through the joints. Over time it can become cracked, recessed, loose, or powdery. When the surrounding bricks are still structurally sound, that damaged material can often be removed and replaced without rebuilding anything — which is why chimney tuckpointing usually costs far less than a rebuild. The National Park Service identifies proper repointing as an important masonry preservation method, while warning that inappropriate mortar and poor workmanship can damage masonry rather than protect it.
Our rule is simple: if the bricks are solid, the chimney is stable, and the damage is limited to repairable mortar joints, chimney tuckpointing may be the right solution. If bricks are moving, the chimney is leaning, or the deterioration runs deep into the structure, the problem may need more than new mortar.
7 Signs You Need Chimney Tuckpointing
Many of these can be spotted from the yard with binoculars or your phone’s zoom — never from the roof.
1. Crumbling or Deteriorating Mortar Joints
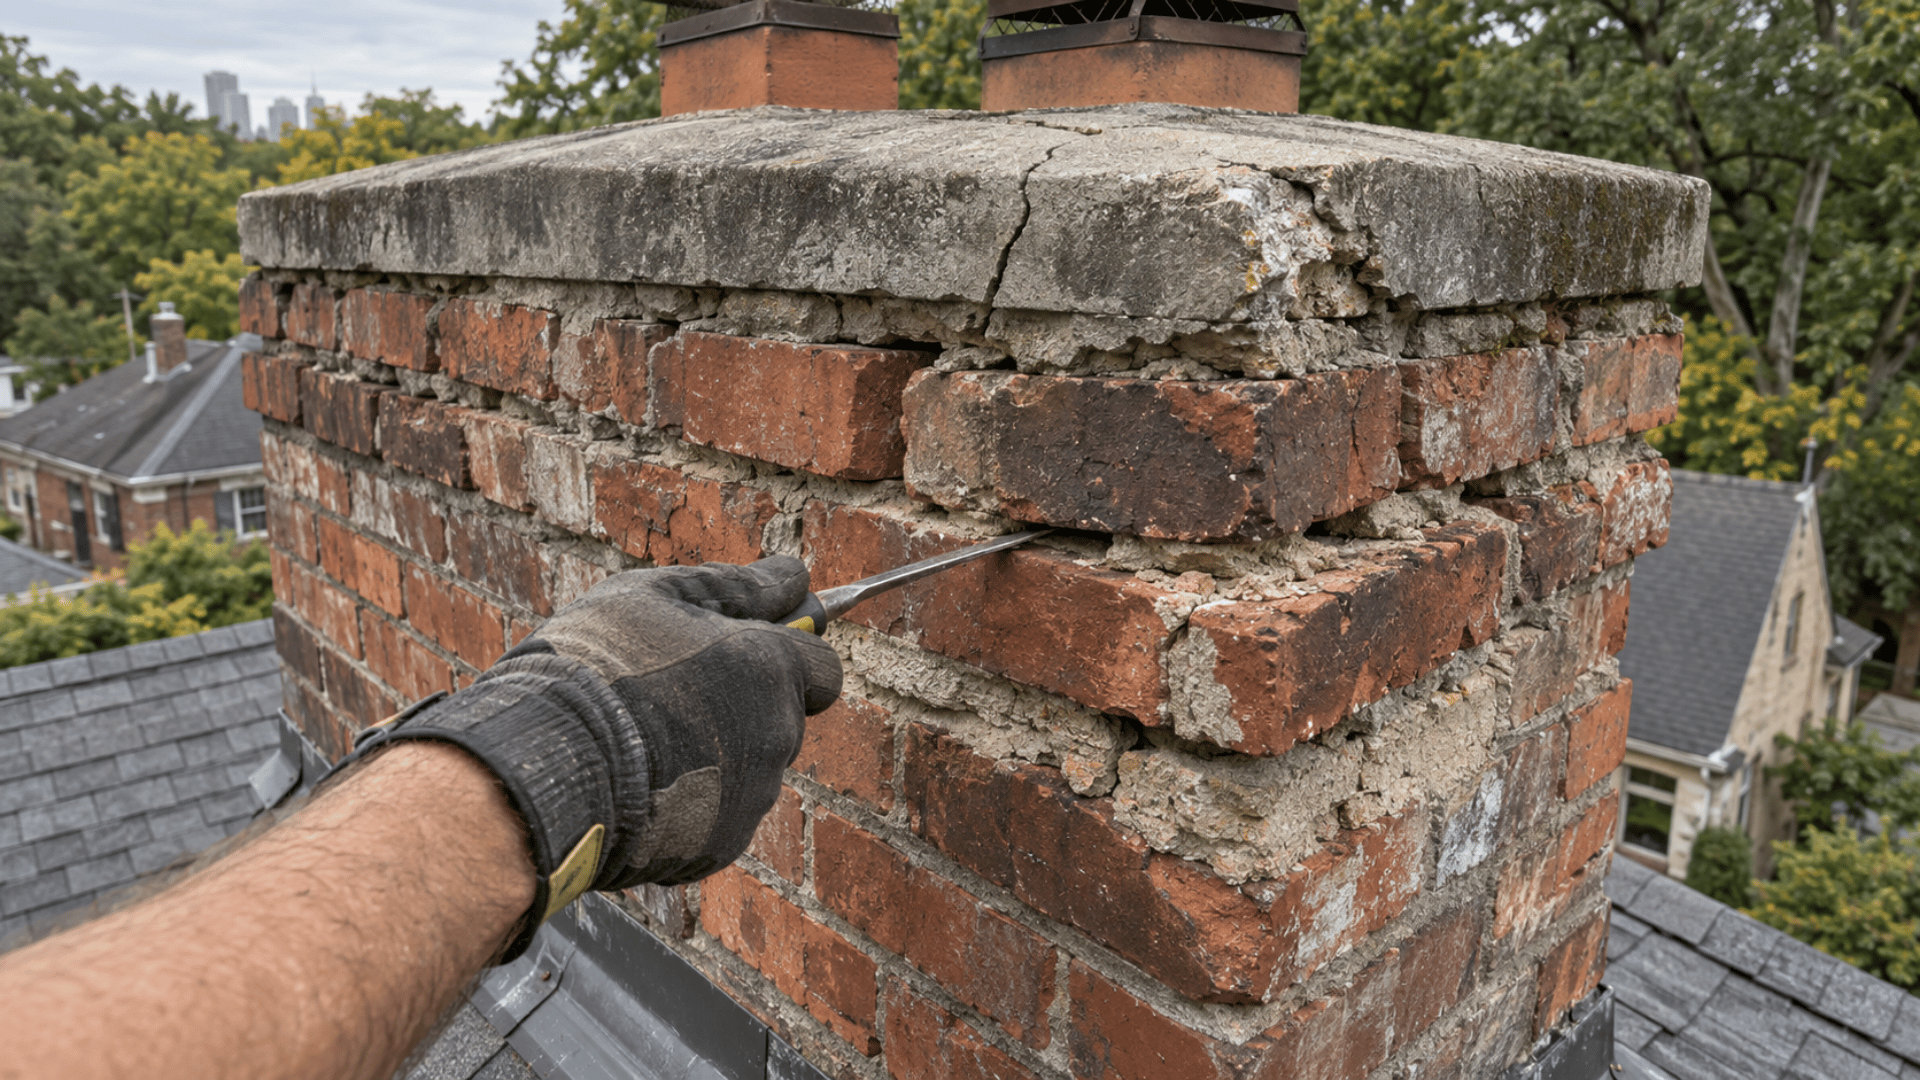
One of the clearest signs you need chimney tuckpointing is mortar that has started breaking apart. You might notice sandy material collecting on the roof near the chimney, mortar flaking off between the bricks, small chunks falling from the joints, mortar that looks soft or powdery, or noticeable gaps where mortar used to be. Healthy mortar is firm and bonded to the surrounding brick. When it turns into loose sand, it’s no longer doing its job — and in Atlanta, exposed chimney mortar goes through repeated cycles of rain, drying, and temperature change that speed that process along.
What to do: if the bricks are still solid and the deterioration is localized, professional chimney tuckpointing may be enough. But if large sections of mortar are missing or several bricks have gone loose, a structural assessment should come first.
2. Recessed Mortar Joints
Look closely at the lines between your chimney bricks. Do they sit noticeably deeper than the brick faces? Mortar can erode slowly until the joints become recessed. As a practical warning sign, recessing around ¼ inch or more deserves a closer look, especially alongside crumbling or cracking. One caveat: some chimneys were intentionally built with recessed joints, so depth alone doesn’t prove failure — the concern is mortar that has eroded away from its original profile. Deep, deteriorated joints collect moisture and make it easier for wind-driven rain to get in.
What to do: have the joints examined to see whether the loss is superficial or runs deeper into the mortar bed. If the remaining mortar is stable, targeted repair may be possible.
3. Visible Cracks Between the Bricks
Cracks in chimney mortar are another warning sign worth taking seriously — fine hairline fractures, vertical or horizontal cracking along the joints, gaps where mortar has pulled away from the brick, or cracks that keep growing wider. A small crack doesn’t automatically mean the chimney is structurally unsafe, but it gives water a way in, and during Atlanta’s colder stretches, water absorbed into porous masonry can freeze and expand, contributing to further deterioration.
An important distinction: a crack confined to a single mortar joint is very different from a large crack running across multiple bricks or through the structure. The second situation calls for a much more extensive inspection.
4. Loose, Shifting, or Unstable Bricks
This is where we get significantly more concerned. Mortar deterioration can eventually weaken the bond holding bricks in place — watch for bricks shifting out of alignment, tilting outward, open gaps around individual bricks, bricks separating from their neighbors, or pieces of masonry falling onto the roof. Loose bricks can mean the mortar has deteriorated past the depth ordinary tuckpointing can reliably repair, and if the upper rows are unstable, a partial rebuild may be necessary.
Important: don’t climb onto the roof to test whether bricks are loose. Have a qualified chimney professional inspect it. And if bricks are falling or the chimney looks visibly unstable, keep people away from the affected area until it’s been evaluated.
5. White Chalky Stains (Efflorescence)
That white, powdery material on your chimney is called efflorescence. It forms when moisture moves through masonry, dissolves soluble salts, and deposits them on the surface as the water evaporates. It isn’t mold, and by itself it doesn’t prove the mortar joints need replacing — but it tells you something important: water is moving through the masonry. The next question is why. Possible causes include deteriorated mortar joints, a cracked chimney crown, failed flashing, excessive masonry absorption, or another moisture-entry point — our guide on why chimneys leak water inside walks through how to track down the source. Cleaning off the white residue improves the look, but it won’t resolve the underlying moisture problem.
6. Spalling or Flaking Bricks
Spalling happens when the outer face of a brick chips, flakes, peels, or breaks away — you might see missing pieces of brick face, rough exposed brick interiors, crumbling corners, or pieces of red masonry collecting below the chimney. Water is a common contributor: when masonry is repeatedly saturated, moisture and temperature changes accelerate the breakdown. Spalling can also come from incompatible mortar, inappropriate coatings, or past abrasive damage.
This distinction matters because chimney tuckpointing restores mortar joints, not the missing faces of damaged bricks. Severely spalled bricks may need to be replaced before the joints can be repaired properly.
7. An Older Chimney With Unknown Maintenance History
Age alone doesn’t mean your chimney is due for tuckpointing. Some well-built masonry chimneys stay in good shape for decades, while others deteriorate much sooner because of poor installation, exposure, moisture intrusion, or incompatible repairs. But if your chimney is 20 to 30 years old (or much older) and you don’t know when the mortar was last professionally evaluated, scheduling an inspection is sensible.
That’s especially true for historic homes in Midtown, Grant Park, Inman Park, Virginia-Highland, and other older Atlanta neighborhoods, where older masonry may need a specialized mortar compatible with the original brick — see our guide on chimney restoration for older Atlanta homes. Don’t automatically repoint a chimney just because it has reached a certain age. Inspect its actual condition first.
Why Chimney Mortar Deteriorates in Atlanta
Atlanta’s weather plays a big role in how masonry ages. The National Weather Service puts Atlanta’s normal annual precipitation at about 50 inches, and unlike a wall protected by a roof overhang, a masonry chimney stands directly above the roofline — exposed to rain, wind, sun, and changing temperatures year-round.
Heavy Rain and Slow Drying
Brick and mortar contain pores that absorb water. During prolonged or repeated rainfall, moisture enters through deteriorated joints and moves deeper into the chimney. Atlanta’s humidity slows how quickly wet masonry dries, and repeated wetting without adequate drying creates the conditions for ongoing deterioration.
Winter Freeze-Thaw Cycles
Atlanta does see temperatures below freezing. When water inside saturated masonry freezes, its expansion can contribute to cracking and spalling. The risk depends on how saturated the masonry is, its material properties, and the number of freeze-thaw cycles — which is why a mild-winter climate isn’t a free pass.
Water Entering Through the Crown or Flashing
The crown is the concrete or masonry surface at the very top of the chimney. When it cracks, water can enter from above rather than only through the exposed vertical faces, deteriorating the mortar underneath — our guide to chimney crown repair covers the warning signs. Flashing, the metal that seals the point where the chimney meets the roof, can cause similar damage near the roofline, with water traveling along masonry or framing before it shows up as a stain inside the house (see chimney flashing problems). That’s why we inspect the crown and flashing before recommending chimney tuckpointing alone — repairing mortar won’t fix a failing crown or defective flashing.
Incompatible Mortar From Past Repairs
This one matters most on historic Atlanta properties. Older bricks are often softer and more porous than modern masonry products, so if a past chimney tuckpointing job used an overly hard or impermeable mortar, it can stop moisture from escaping normally through the joints — which shifts the deterioration into the surrounding brick. The strongest mortar isn’t always the best mortar. The right mortar is the one compatible with the existing masonry.
A Representative Alpharetta Scenario: When Chimney Tuckpointing Wasn’t Enough
This is a representative scenario illustrating the kind of hidden deterioration chimney professionals may uncover. The figures describe this example, not a verified Clean Air customer invoice.
Consider a homeowner who buys an older property in Alpharetta and notices two things: white efflorescence on the chimney, and several deteriorated mortar joints near the upper brickwork. From the ground, the damage looks cosmetic. The chimney is still standing, most of the bricks look intact, and the homeowner expects a small chimney tuckpointing job.
What the Inspection Reveals
A closer exterior look shows a severely cracked chimney crown that has been letting rainwater into the upper masonry for a long time. Once the affected joints are evaluated, the deterioration turns out to run much deeper than surface mortar: portions of the upper chimney have joints that are badly deteriorated well into the masonry, and several bricks have lost their stability. The structure starts to resemble a game of Jenga, with pieces no longer securely supporting the courses above them.
The Hidden Liner Problem
Because the masonry damage is significant, the interior gets a Level 2 camera inspection — and it shows cracks in sections of the clay flue liner. That matters because repointing exterior mortar doesn’t repair internal flue damage, and a compromised liner may no longer contain heat and combustion products as designed. We cover that side of the problem in our guide to chimney liner damage.
The Repair Recommendation
Instead of a cosmetic repair, the real scope looks like this:
- Remove the unstable upper chimney courses
- Rebuild the affected masonry
- Address the damaged liner with an appropriate repair or relining system
- Construct a properly designed chimney crown
- Correct the water-entry points
In this example, the combined estimate reaches approximately $12,000 — nowhere near a typical tuckpointing price. It’s a structural rebuilding and liner project.
The lesson: the mistake would have been spending money on exterior mortar repairs without first checking whether the upper chimney was still structurally sound. Chimney tuckpointing can restore deteriorated joints. It can’t stabilize a chimney whose underlying brickwork is already failing.
Chimney Tuckpointing vs. Partial Rebuild vs. Full Rebuild
How do you know which one you actually need? The decision comes down to how far the damage has progressed.
| Condition | Chimney Tuckpointing | Partial Rebuild | Major / Full Rebuild |
|---|---|---|---|
| Mortar deterioration | Localized or repairable joints | Deep failure in upper courses | Widespread deep deterioration |
| Brick stability | Bricks remain firmly in place | Upper bricks loose or damaged | Large portions unstable |
| Alignment | No significant movement | Upper stack may be displaced | Major leaning or displacement |
| Spalling | Limited, repairable damage | Concentrated in upper masonry | Widespread severe brick failure |
| Flue condition | No unresolved liner hazard | May require localized liner work | May require extensive separate flue repairs |
When Chimney Tuckpointing Makes Sense
Tuckpointing is often the right call when the bricks are structurally sound, the chimney is stable, the original mortar has deteriorated in accessible joints, there’s no major leaning or displacement, and the underlying moisture source can be corrected. The mason removes the failed material, prepares the joints, and installs compatible mortar — extending the service life of the existing masonry without rebuilding it.
When a Partial Chimney Rebuild Is Necessary
A partial rebuild may be appropriate when the upper section has deteriorated beyond practical joint repair — the top rows are loose, mortar has failed through the joints, multiple bricks are badly spalled, the upper stack is displaced, or the crown and upper masonry are extensively damaged. The damaged portion is dismantled back to sound masonry and reconstructed, with the crown and any affected flue components addressed as needed.
When a Full or Major Rebuild Is Necessary
A more extensive rebuild may be required when the chimney is significantly leaning, structural movement extends down the stack, bricks are unstable across large sections, severe deterioration reaches far below the roofline, foundation or support problems are present, or the masonry can’t safely support the structure.
One clarification: a cracked flue liner by itself doesn’t automatically mean the whole chimney must be rebuilt. Liner work and structural masonry rebuilding are separate decisions, though they can be needed together. For the broader decision, see our guide to chimney repair vs. replacement.
What a Proper Chimney Tuckpointing Job Includes
A professional chimney tuckpointing job involves a lot more than pushing new mortar into visible cracks.
Inspect the Chimney and Protect the Roof
Before work begins, the crew evaluates the chimney and decides which joints need repair. Depending on the property, that may mean roof brackets, fall-protection systems, scaffolding, protective tarps, or plywood to protect the roofing materials — the goal is protecting both the workers and your roof.
Remove the Failed Mortar to the Right Depth
This is one of the most important phases, and it’s where the most common shortcut happens: new mortar smeared over loose old mortar. It may look repaired for a while, but it hasn’t bonded to sound material, and thin surface patches separate as the chimney goes through weather and movement. Proper chimney tuckpointing requires joint preparation, not cosmetic coverage.
The National Park Service recommends removing mortar to a depth of roughly 2 to 2½ times the joint width for historic masonry repointing — for many typical brick joints, that works out to about ½ to 1 inch, though the actual depth depends on joint geometry and the condition of the mortar. On historic brick, mechanical grinding needs careful control (hand tools are often preferred), because a grinder can cut into brick edges and faces, and softer historic brick is especially vulnerable. Damaging the brick while removing mortar can create a far more expensive problem than the original deteriorated joint. Once the old mortar is out, the joints are cleaned of loose particles, dust, and unbonded material so the new mortar can bond to sound masonry.
Choose Mortar That’s Compatible With Your Brick
Mortar selection isn’t just a matter of grabbing a bag from the hardware store. The mason evaluates brick hardness, existing mortar composition, moisture permeability, joint dimensions, historic construction methods, required strength, and color and texture. A modern chimney may be compatible with an appropriate Portland cement–lime mortar, while historic brickwork may need a softer, lime-rich mix — and for important historic properties, mortar analysis can be worth it. That’s why we don’t assume Type S, Type M, or any other modern mix is automatically suitable: mortar that’s too hard or too impermeable can contribute to brick damage over time.
Damp, Pack, and Tool the Joints
Before new mortar goes in, absorbent joints may need controlled pre-wetting so dry brick doesn’t pull moisture out of the fresh mortar too quickly — the goal is damp masonry without standing water. The mortar is then packed firmly into the prepared joints (deeper joints in layers, to minimize voids) and tooled to match the appropriate profile — concave, flush, or another historically appropriate finish. Proper tooling gives a consistent, weather-resistant surface. Mortar smeared across the brick faces or left in sloppy, overfilled piles is a warning sign of poor workmanship: it changes the chimney’s appearance and can interfere with water shedding and drying.
Clean Up and Cure Properly
Loose mortar and residue should be cleaned carefully, without smearing or damaging the brick faces. Fresh mortar needs protection from drying too quickly, freezing, and harsh cleaning chemicals — if highly absorbent bricks pull water out of the mix, or the work sits in heat and wind without protection, mortar performance suffers. Aggressive acid washing, especially on historic or freshly repointed masonry, can cause additional damage and shouldn’t be treated as routine cleanup. The curing and protection schedule should match the specific mortar system and the weather.
Should You Waterproof After Chimney Tuckpointing?
Waterproofing can be a useful extra layer of protection after chimney tuckpointing, particularly on exposed masonry with a history of absorbing too much rainwater. But it isn’t automatically required for every chimney — especially historic masonry, where coating decisions should be made carefully. Our guide to chimney waterproofing covers the signs and the process in depth.
Why Breathability Matters
A penetrating, vapor-permeable masonry water repellent is very different from ordinary exterior paint or a thick, non-breathable coating. Compatible silane/siloxane products can reduce liquid-water absorption while still letting moisture vapor escape — but the product has to be appropriate for your specific masonry.
How Long to Wait
There’s no universal 28-day rule for every mortar repair. As one example, the manufacturer of ChimneySaver Water-Base specifies at least 72 hours after repairing loose or missing mortar joints, and at least 28 days for new masonry and concrete. Other repair mortars and water-repellent systems have different requirements — always follow the instructions for the specific products being used, and make sure the masonry is suitable for treatment.
Can Waterproofing Replace Tuckpointing?
No. A penetrating repellent can’t replace missing mortar, stabilize loose brick, or repair a fractured crown — and if the crown is cracked or the flashing is leaking, waterproofing the brickwork won’t correct those openings. Repair the physical damage first. Then consider additional water protection.
How Much Does Chimney Tuckpointing Cost in Atlanta?
Chimney tuckpointing prices depend on how much mortar is damaged, roof access, the type of masonry, chimney size, and whether other repairs are needed. For planning purposes, these are the starting ranges Atlanta homeowners may run into:
| Project Type | Starting Price Range |
|---|---|
| Small localized mortar repairs | $300 – $500 |
| Small chimney tuckpointing | $500 – $1,000 |
| Medium residential chimney | $1,000 – $2,000 |
| Large or complex chimney | $2,000 – $4,000+ |
For some projects, masonry work may also be estimated at roughly $8 to $30 per square foot, depending on how much joint removal is needed, access, mortar type, and labor. These are approximate Atlanta-area planning ranges — not fixed quotes or independently verified market averages — so a proper estimate should spell out exactly what work is included.
What Makes Chimney Tuckpointing More Expensive?
- Roof height and pitch. Steep or multi-story roofs require more access equipment, safety measures, and labor time.
- Historic mortar. Matching an older mortar’s strength, permeability, texture, and color takes extra care and sometimes specialized materials.
- Extent of joint deterioration. Repointing ten joints is a different job than repointing all four sides of a chimney.
- Brick replacement. Spalled or unstable bricks may need separate chimney masonry repair before the joints can be done.
- Crown damage. Minor crown repairs may start around $150–$350, while substantial crown reconstruction can reach $3,000 or more.
- Flashing and waterproofing. Both are priced separately depending on scope — see our guides to flashing problems and waterproofing for details.
- Hidden structural damage. If the chimney needs rebuilding or liner repair, the project can cost substantially more than tuckpointing alone, as in the Alpharetta scenario above.
When Is Chimney Mortar Damage a Safety Issue?
Some masonry problems are routine maintenance. Others need professional attention right away.
- The chimney is leaning or separating from the house. That can indicate structural movement. Don’t assume tuckpointing can correct the cause — keep people away from areas where masonry could fall, and arrange a prompt professional assessment.
- Bricks are loose or falling. The problem may extend beyond ordinary joint deterioration. Don’t try to repair or test loose masonry from the roof yourself.
- Large cracks run across the chimney. Cracks crossing multiple bricks or long sections of masonry should be evaluated for movement or structural damage. Not every horizontal crack means collapse is imminent, but serious cracks should never be dismissed as cosmetic.
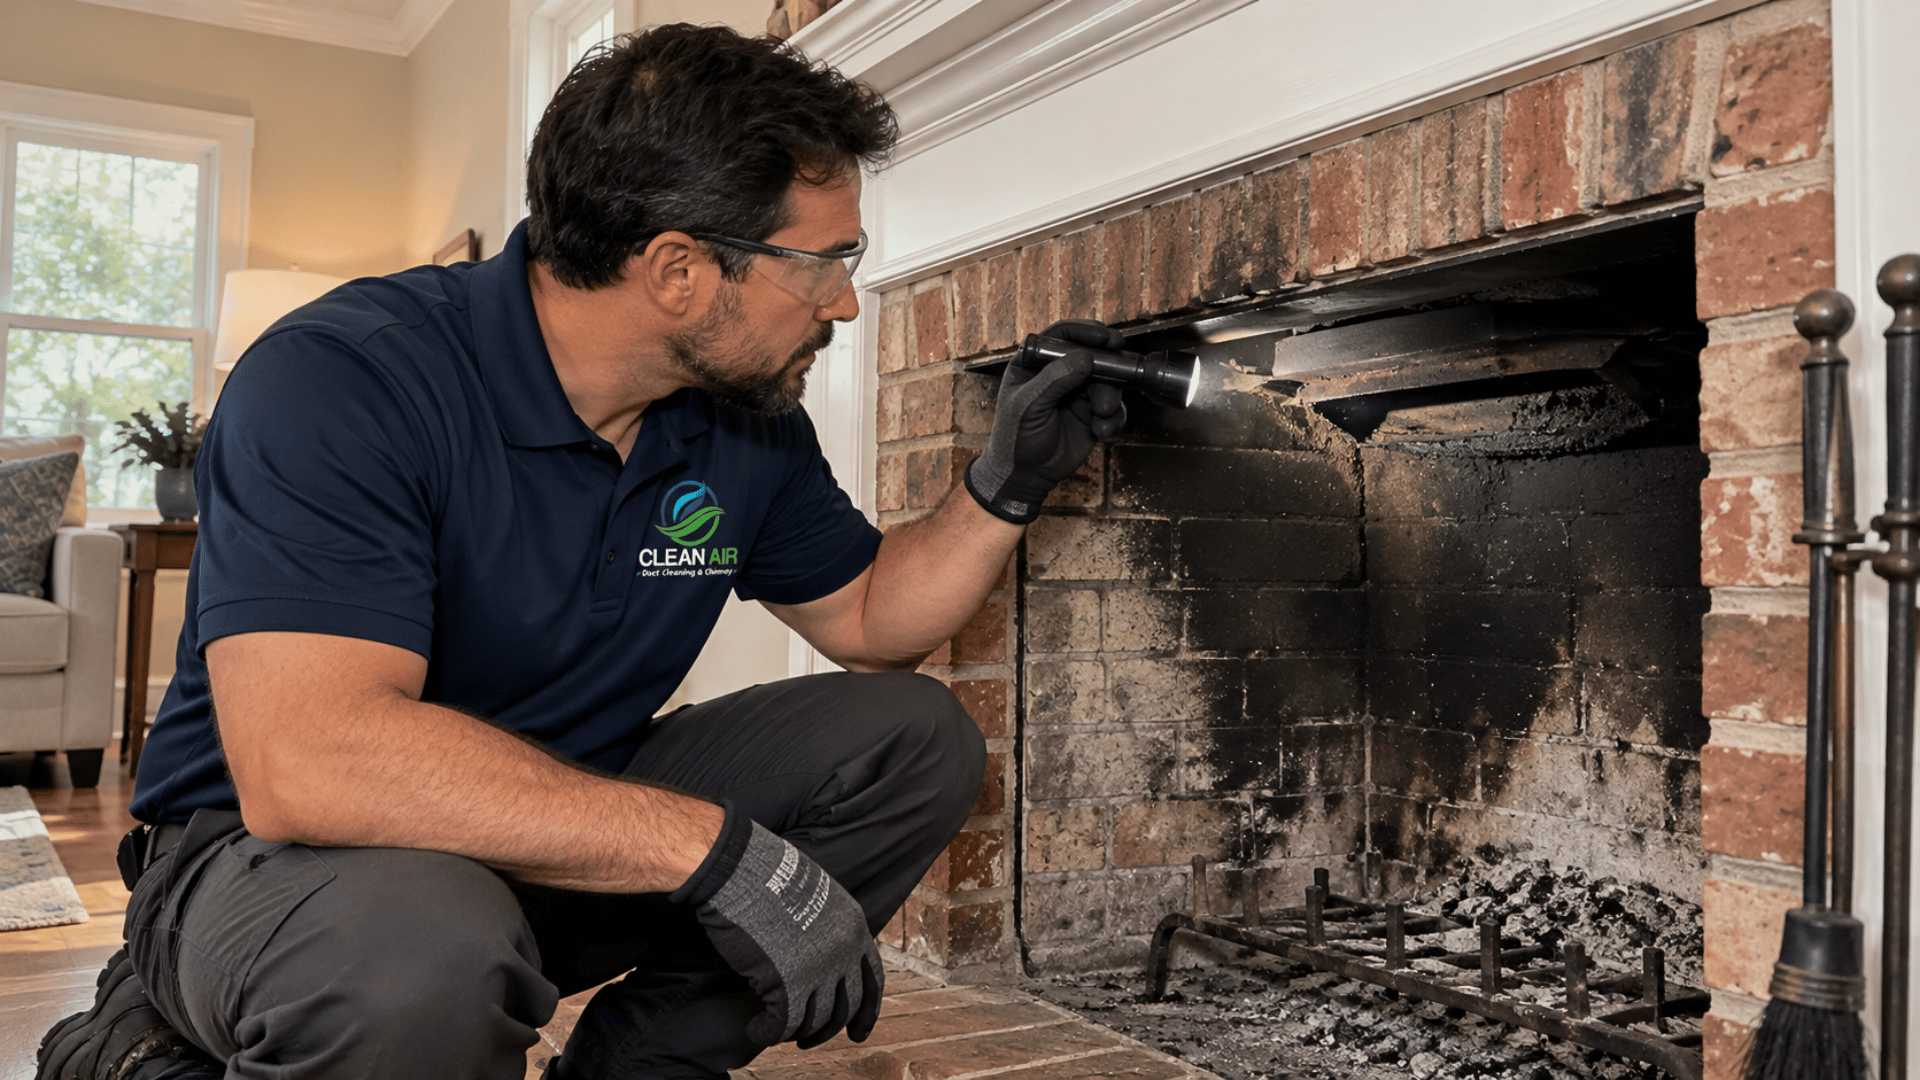
- Clay tile or masonry debris appears inside the fireplace. Stop using the fireplace. The flue system may be damaged, and it needs an inspection before further use — see our guide to chimney liner damage.
- Water damage is showing up indoors. Stains, softened drywall, peeling paint, or a persistent musty odor around the chimney don’t automatically prove structural failure or a particular type of mold, but they do mean the water-entry source should be investigated promptly.
If the chimney appears unstable or the flue may be compromised, don’t use the fireplace until a qualified professional has evaluated it.
What Chimney Tuckpointing Won’t Fix
Chimney tuckpointing restores mortar joints. It doesn’t automatically solve everything around them. It won’t fix:
- Missing or badly spalled brick faces. Tuckpointing restores joints, not bricks — severely damaged bricks may need to be replaced first.
- A leaning or structurally failing chimney. New mortar can’t stabilize underlying brickwork that’s already failing — see our guide to chimney repair vs. replacement.
- A cracked crown or a missing cap. Water entering from the top will keep damaging fresh joints from behind until the crown and cap are repaired.
- Flashing leaks. If water is entering at the roofline, the flashing needs repair — mortar work won’t touch it.
- Internal flue damage. Repairing exterior mortar doesn’t repair cracked clay liner tiles inside the chimney.
- Existing interior water damage. Stained ceilings and soft drywall from water that already got in need their own repair.
If you’re not sure which of these apply to your chimney, an inspection is how you find out before paying for repairs that don’t address the real problem.
Before You Hire a Chimney Tuckpointing Contractor
Do You Need a Level 2 Inspection First?
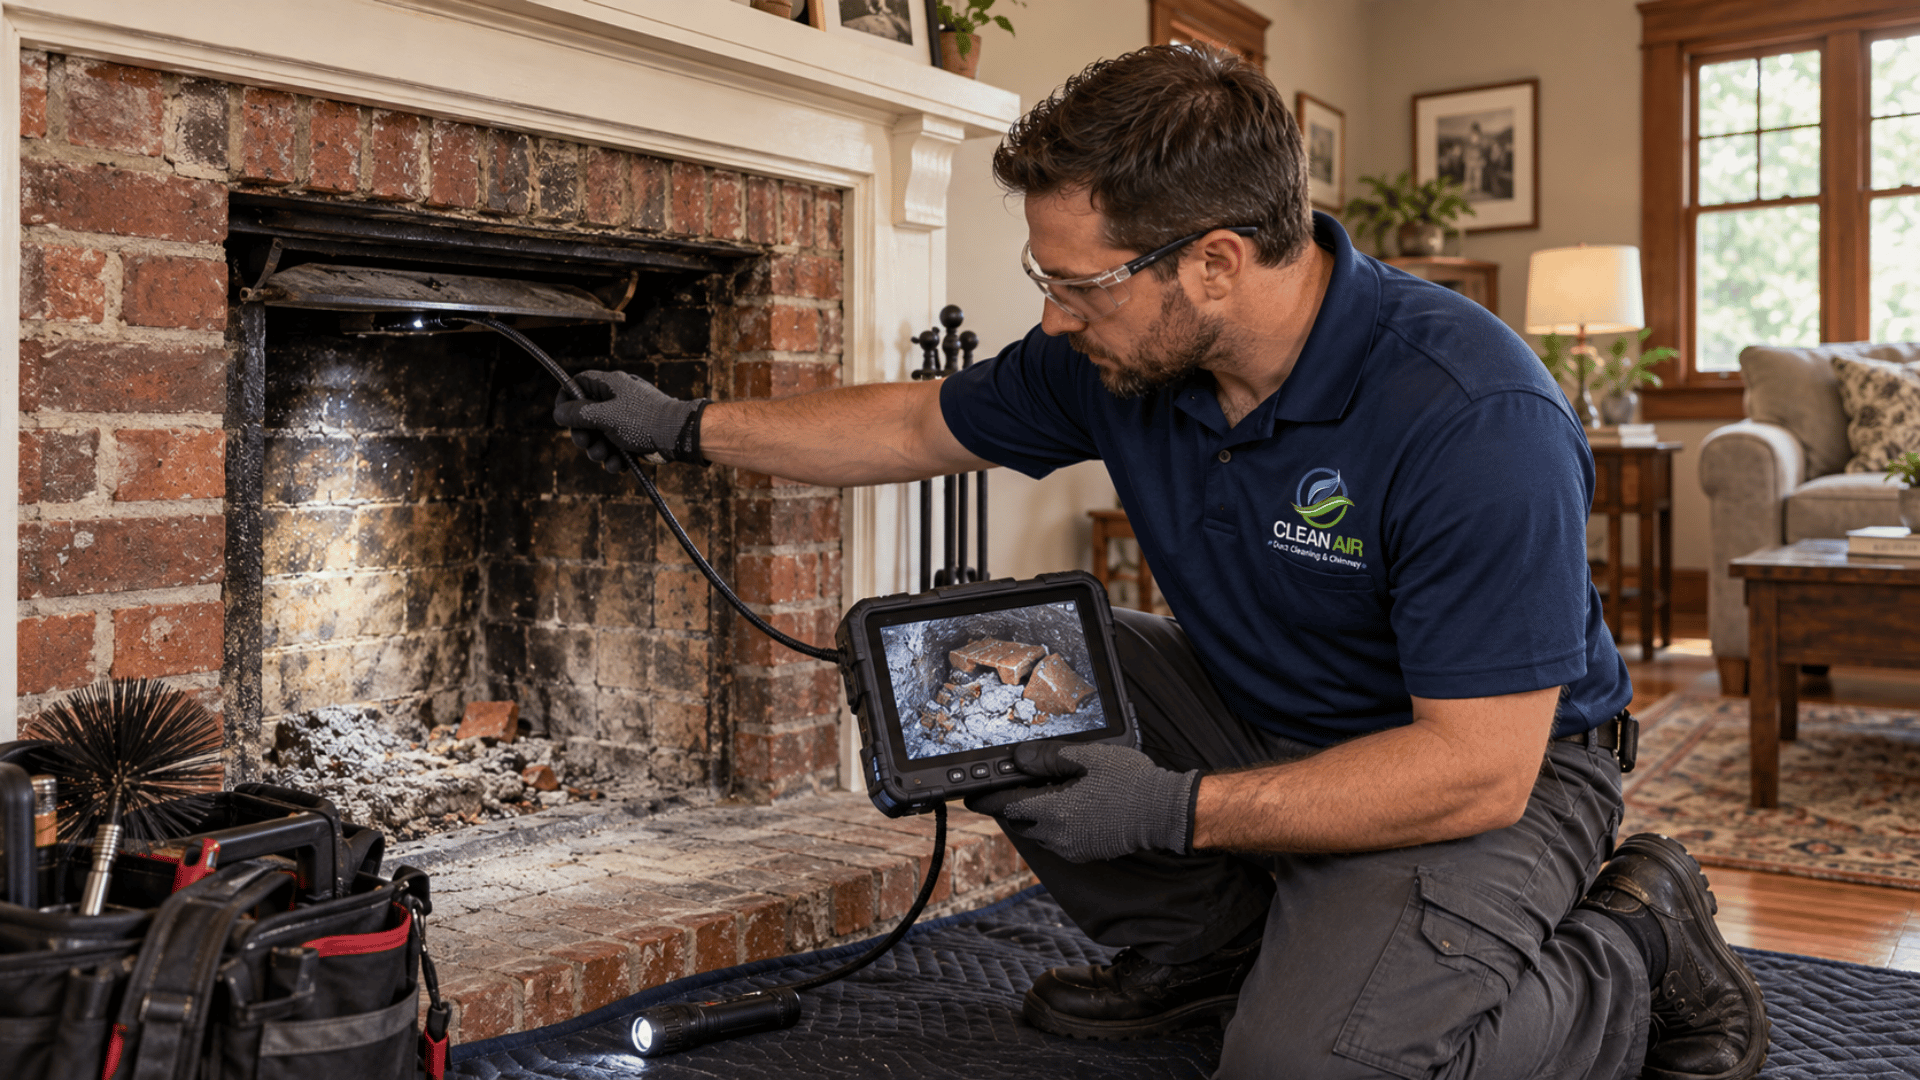
Not every chimney tuckpointing job requires one. For limited exterior mortar deterioration on an otherwise stable system, a good exterior masonry assessment may be enough to plan the work. But a Level 2 inspection is appropriate when there are signs of internal flue damage, the chimney has had a fire, significant masonry displacement is present, the system is malfunctioning, the home is being bought or sold, a Level 1 can’t establish serviceability, or relining or other changes are planned. A Level 2 includes a video scan or comparable internal examination of the flue — which matters because repairing exterior mortar doesn’t repair damaged clay liner tiles inside. For the full breakdown, see our guide to the three chimney inspection levels.
Questions to Ask Before Approving the Work
- How much of the existing mortar is actually deteriorated — and can you show me photos of the damaged joints?
- Are the bricks still structurally sound?
- What mortar type are you proposing, and is it compatible with the age and hardness of my brick?
- How deep will you remove the failed material, and how will you protect the surrounding bricks while you do it?
- Is the chimney crown contributing to the problem, and have you checked the flashing and other water-entry points?
- Does my chimney need tuckpointing, brick replacement, or a partial rebuild?
- Is an internal camera inspection appropriate in this case?
- What curing and optional waterproofing procedures do you recommend?
A professional should be able to explain the repair and show you the actual condition of the masonry.
How to Choose the Right Chimney Company
Beyond asking the right questions, look for the same baseline credentials that matter for any chimney work:
- CSIA certification — the Chimney Safety Institute of America sets the industry’s recognized training standard
- Proof of insurance — protects you if something goes wrong on your property
- BBB accreditation — a verifiable track record, not just a promise
- Willingness to show you the work — photos of the damaged joints before and the finished repair after, not just a verbal description
Be cautious of anyone who quotes a price over the phone without ever looking at the chimney, or who wants to rebuild a chimney whose bricks are still solid.
Final Answer
Chimney tuckpointing is the right fix when the bricks are solid, the chimney is stable, and the damage is limited to deteriorated mortar joints. It’s not the right fix when bricks are loose or spalled, the crown is cracked, the flashing is leaking, the chimney is leaning, or the flue liner is damaged — those need their own repairs, sometimes alongside the mortar work. A good inspection answers three questions: is the chimney structurally sound, what caused the mortar to fail, and is the internal system safe to use?
Final Advice From Our Team
This depends on the chimney — but if you notice small cracks, white stains, or mortar starting to crumble, don’t assume the whole chimney needs replacing, and don’t assume it’s purely cosmetic either.
First, is the chimney structurally sound? If the bricks are stable and the problem is limited to deteriorated joints, tuckpointing may be enough. Second, what caused the mortar to fail? Weather, a cracked crown, defective flashing, incompatible mortar — if the cause isn’t corrected, the damage comes back. Third, is the internal system safe? If there are signs of liner damage, a chimney fire, or significant shifting, get an internal inspection before the fireplace is used again.
Don’t wait until a few crumbling joints become a major chimney restoration project.
Call (470) 706-6431 or contact us to schedule a chimney tuckpointing inspection in Atlanta, GA.
FAQ
What is chimney tuckpointing?
Chimney tuckpointing is the process of removing damaged or deteriorated mortar from between the bricks and replacing it with new, compatible mortar, restoring the joints without rebuilding the chimney.
How much does chimney tuckpointing cost in Atlanta?
Starting ranges run roughly $300–$500 for small localized mortar repairs, $500–$1,000 for a small chimney, $1,000–$2,000 for a medium residential chimney, and $2,000–$4,000+ for a large or complex one. These are planning ranges, not fixed quotes — roof access, mortar type, and the extent of joint deterioration all move the final price.
How do I know if my chimney needs tuckpointing?
Look for deteriorated mortar, recessed joints, visible cracking, loose bricks, and moisture-related masonry damage like efflorescence or spalling. A professional should confirm whether the defects are limited to repairable joints or whether the chimney has deeper damage.
Is chimney tuckpointing the same as repointing?
In everyday contractor language, the terms are used interchangeably. Technically, repointing means removing damaged mortar and replacing it, while traditional tuckpointing refers to a decorative joint-finishing technique.
Can you tuckpoint a chimney without rebuilding it?
Yes. If the masonry remains structurally stable and the affected joints are suitable for repair, tuckpointing can restore the mortar without rebuilding the entire chimney.
How long does chimney tuckpointing last?
There’s no guaranteed lifespan. Longevity depends on mortar compatibility, masonry condition, exposure, workmanship, and whether the original source of the deterioration was corrected. A properly executed repair may remain serviceable for many years.
Does chimney tuckpointing stop chimney leaks?
It can reduce water entry through defective mortar joints. It won’t repair a missing chimney cap, damaged flashing, or a cracked chimney crown.
Can I tuckpoint my own chimney?
Small masonry projects can look straightforward, but chimney repairs involve working at height, choosing compatible mortar, and telling cosmetic deterioration apart from structural damage. For roof-level chimney work, professional evaluation and repair are generally safer.
Should I waterproof after chimney tuckpointing?
A compatible, breathable water repellent may be beneficial where excessive masonry absorption is an issue. The choice should depend on the masonry and how it handles moisture, particularly for historic brick.
Is Type S mortar suitable for an old chimney?
Not automatically. Some chimneys may be compatible with it, but older, softer brick frequently needs a more compatible mortar mix. The correct selection depends on the masonry, not just the age of the house.
What happens if I ignore deteriorating chimney mortar?
The damage may progress, letting more water in and contributing to loose masonry, spalling, or larger repairs. Not every deteriorated joint becomes a structural emergency, but early diagnosis usually leaves more repair options.
Do all old Atlanta chimneys need tuckpointing?
No. Age is a reason to assess maintenance history and condition — not proof that the mortar needs replacing.